Node.js Folder Creation: Step-by-Step Guide for Beginners
- Published on
- Jigar Patel--3 min read
Overview
- Introduction
- Prerequisites:
- Step 1: Set Up a New Node.js Project
- Step 2: Utilize the Built-In fs Module
- Step 3: Write the JavaScript Code
- Step 4: Run the Node.js Script
- Step 5: Verify the Created Folders
- Quick summary
- Source Code
- About the Author
- We're Hiring
- Related Blogs

Introduction
Node.js is a versatile and powerful runtime environment for server-side applications, and it's also handy for performing various file system operations, such as creating multiple folders. In this step-by-step guide, we will walk you through the process of creating multiple folders using Node.js.
Prerequisites:
Before you get started, make sure you have Node.js installed on your computer. You can download it from the official Node.js website.
Step 1: Set Up a New Node.js Project
If you don't already have a Node.js project, you can create one by following these steps:
-
Open your terminal or command prompt.
-
Navigate to the directory where you want to create your Node.js project using the
cdcommand. For example:cd path/to/your/project -
Initialize a new Node.js project by running:
npm initThis command will guide you through the setup process and create a
package.jsonfile for your project.
Step 2: Utilize the Built-In fs Module
Node.js comes with a built-in fs (File System) module, so there's no need to install any additional packages for this task.
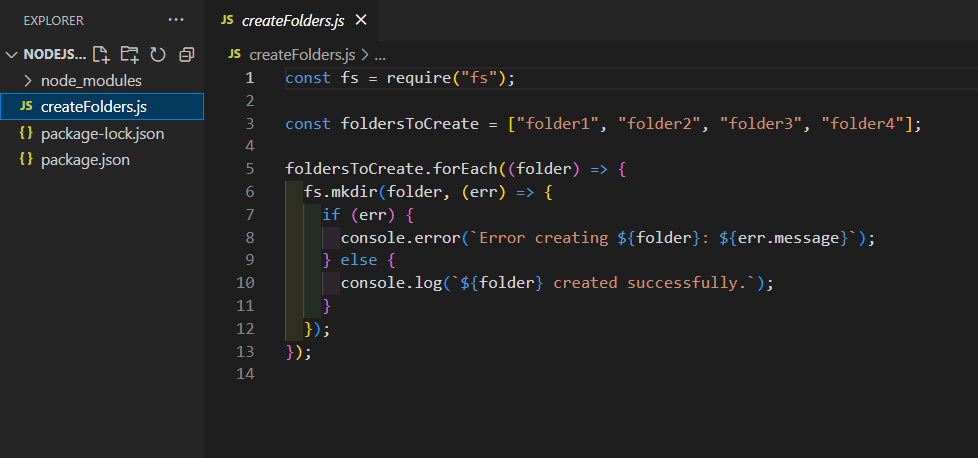
Step 3: Write the JavaScript Code
Create a JavaScript file (e.g., createFolders.js) in your project directory to write the code for creating multiple folders. Here's an example script to create three folders: folder1, folder2, and folder3.
const fs = require('fs');

const foldersToCreate = ['folder1', 'folder2', 'folder3', 'folder4'];

foldersToCreate.forEach((folder) => {
  fs.mkdir(folder, (err) => {
    if (err) {
      console.error(`Error creating ${folder}: ${err.message}`);
    } else {
      console.log(`${folder} created successfully.`);
    }
  });
});
This script imports the fs module, defines an array of folder names to create, and uses a forEach loop to create each folder.If there is any error during folder creation, it will be logged to the console.
Step 4: Run the Node.js Script
To execute your Node.js script, open your terminal, navigate to your project directory, and run the following command:
node createFolders.js
This will execute the script, and you should see output indicating whether each folder was created successfully or if there was an error.
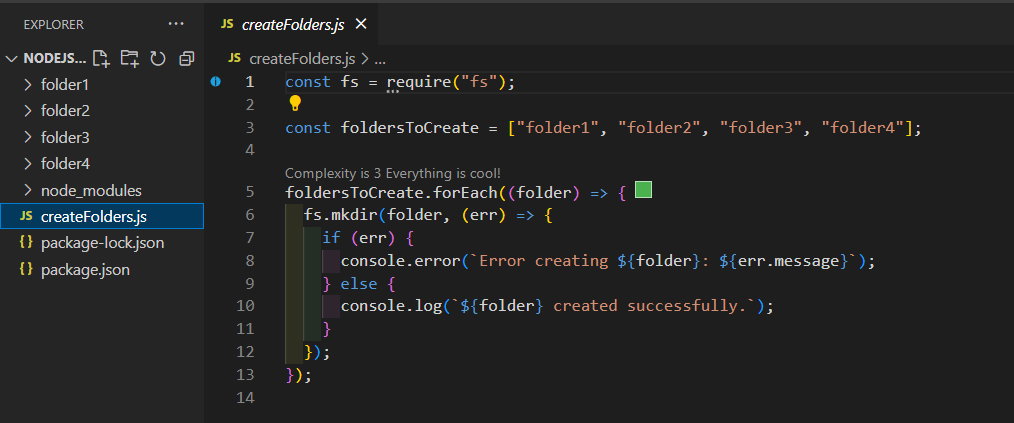
Step 5: Verify the Created Folders
Check your project directory, and you should find the three folders (folder1, folder2, and folder3) created and ready for use.
Congratulations! You've successfully created multiple folders using Node.js. You can customize the script to create different folders or a different number of folders based on your specific needs.
Quick summary
Node.js provides a flexible environment for working with files and directories, making it a valuable tool for various tasks, including folder creation. Enjoy exploring the possibilities that Node.js offers!
Output :

Source Code
The complete source code for this tutorial is available on GitHub. You can find it Here.
About the Author
Jigar Patel is a enthusiast and a software developer at JBCodeapp Company. Visit our JBCodeapp to learn more about our work in the Laravel ecosystem.
We're Hiring
Are you passionate about Laravel development? We're always on the lookout for talented developers to join our team. Check out our Careers Page for current job openings.