Crop Images Easily in Laravel with Cropper.js
- Published on
- Jigar Patel--6 min read
Overview
- Introduction to Cropper.js
- Step 1: Install Laravel
- Step 2: Create Migration and Model
- Step 3: Create Controller
- Step 4: Define Routes
- Step 5: Create Blade File
- Quick summary:
- Source Code
- About the Author
- We're Hiring
- Related Blogs

Introduction to Cropper.js
Cropper.js is an open-source JavaScript library that simplifies image cropping with a user-friendly and customizable interface. With Cropper.js, developers can effortlessly integrate image cropping functionality into their web applications. This powerful library offers a wide range of features, including the ability to crop images to specific dimensions or aspect ratios, zoom in and out of images, rotate images, and crop images into various shapes like rectangles, circles, and ellipses.
In this example, we'll create a "media" table in our database with a "name" column. We'll then create a simple form for image uploads. After selecting an image, a modal will open with the Cropper.js plugin, allowing you to crop the image before saving it. Once cropped, we'll store the image in a folder and save its details in the database.
Let's dive into the steps to achieve this:
Step 1: Install Laravel
To begin, let's create a fresh Laravel application using the following command in your terminal or command prompt:
composer create-project laravel/laravel crop-image
Step 2: Create Migration and Model
In this step, we'll create a database migration for the "media" table and generate a corresponding model.
Run the following command to create the migration:
php artisan make:migration create_media_table
Next, open the newly created migration file and define the table schema. Here's an example of the migration:
<?php

use Illuminate\Database\Migrations\Migration;
use Illuminate\Database\Schema\Blueprint;
use Illuminate\Support\Facades\Schema;

return new class extends Migration
{
    public function up(): void
    {
        Schema::create('media', function (Blueprint $table) {
            $table->id();
            $table->string('name');
            $table->timestamps();
        });
    }

    public function down(): void
    {
        Schema::dropIfExists('media');
    }
};
Now, apply the migration to create the "media" table:
php artisan migrate
Next, generate a model for the "media" table:
php artisan make:model Media
Step 3: Create Controller
In this step, we'll create a new controller named "CropImageController" to handle image uploads and cropping. This controller will have two methods: "index" to display the form and "store" to process image uploads and cropping.
Generate the controller using the following command:
php artisan make:controller CropImageController
Edit the CropImageController.php file with the following code:
<?php

namespace App\Http\Controllers;

use Illuminate\Http\Request;
use Illuminate\View\View;
use Illuminate\Http\RedirectResponse;
use App\Models\Media;

class CropImageController extends Controller
{
    public function index(): View
    {
        return view('cropImage');
    }

    public function store(Request $request): RedirectResponse
    {
        $validatedData = $request->validate([
            'image_base64' => 'required',
        ]);

        $input['name'] = $this->storeBase64($request->image_base64);
        Media::create($input);

        return back()->with('success', 'Image uploaded successfully.');
    }

    private function storeBase64($imageBase64)
    {
        list($type, $imageBase64) = explode(';', $imageBase64);
        list(, $imageBase64)      = explode(',', $imageBase64);
        $imageBase64 = base64_decode($imageBase64);
        $imageName = time() . '.png';
        $path = public_path() . "/uploads/" . $imageName;

        file_put_contents($path, $imageBase64);

        return $imageName;
    }
}
Step 4: Define Routes
Open the "routes/web.php" file and add routes for both displaying the form and handling image uploads:
use Illuminate\Support\Facades\Route;
use App\Http\Controllers\CropImageController;

Route::get('crop-image-upload', [CropImageController::class, 'index']);
Route::post('crop-image-upload', [CropImageController::class, 'store'])->name('crop.image.upload.store');
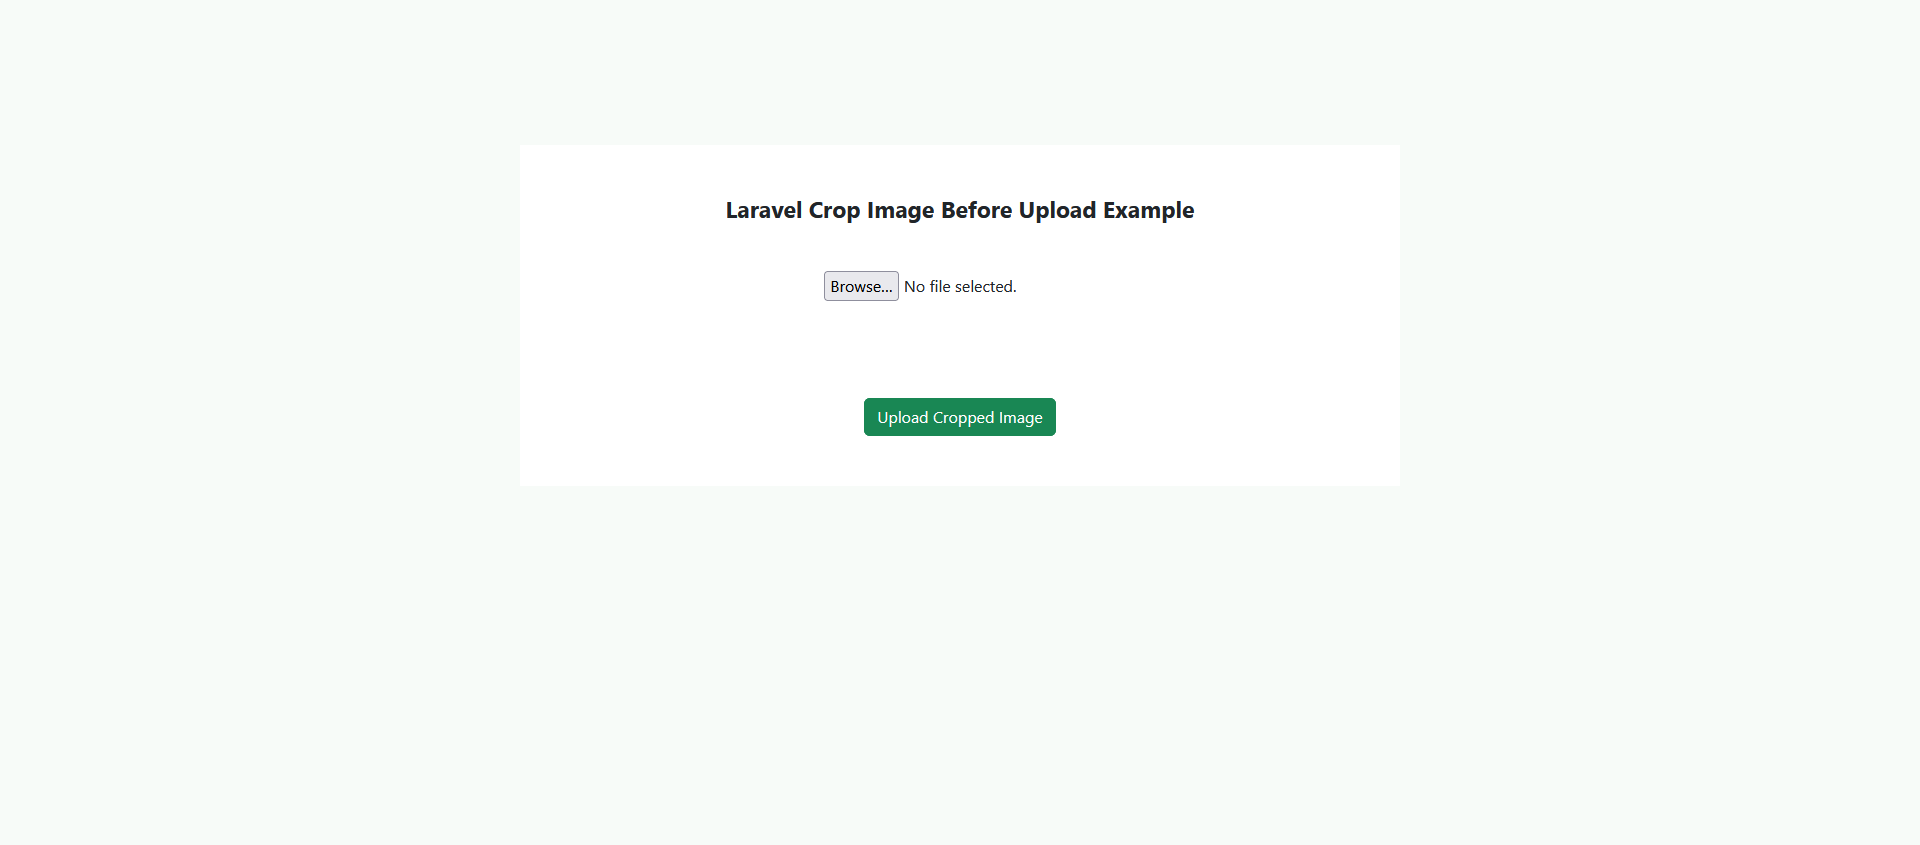
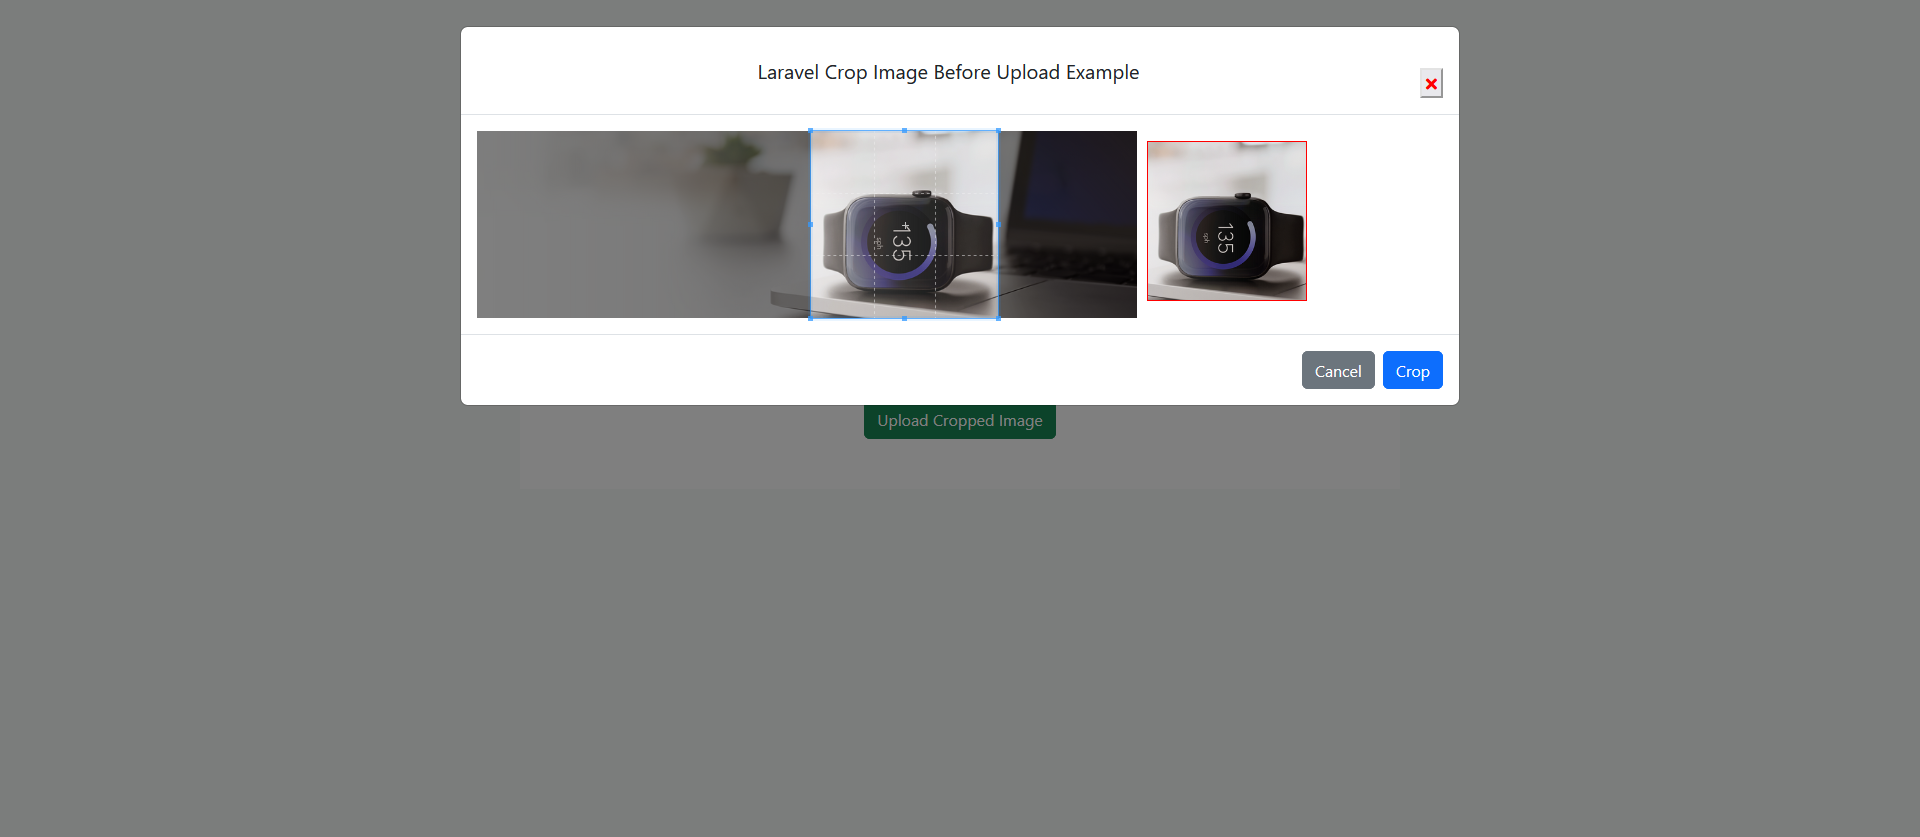
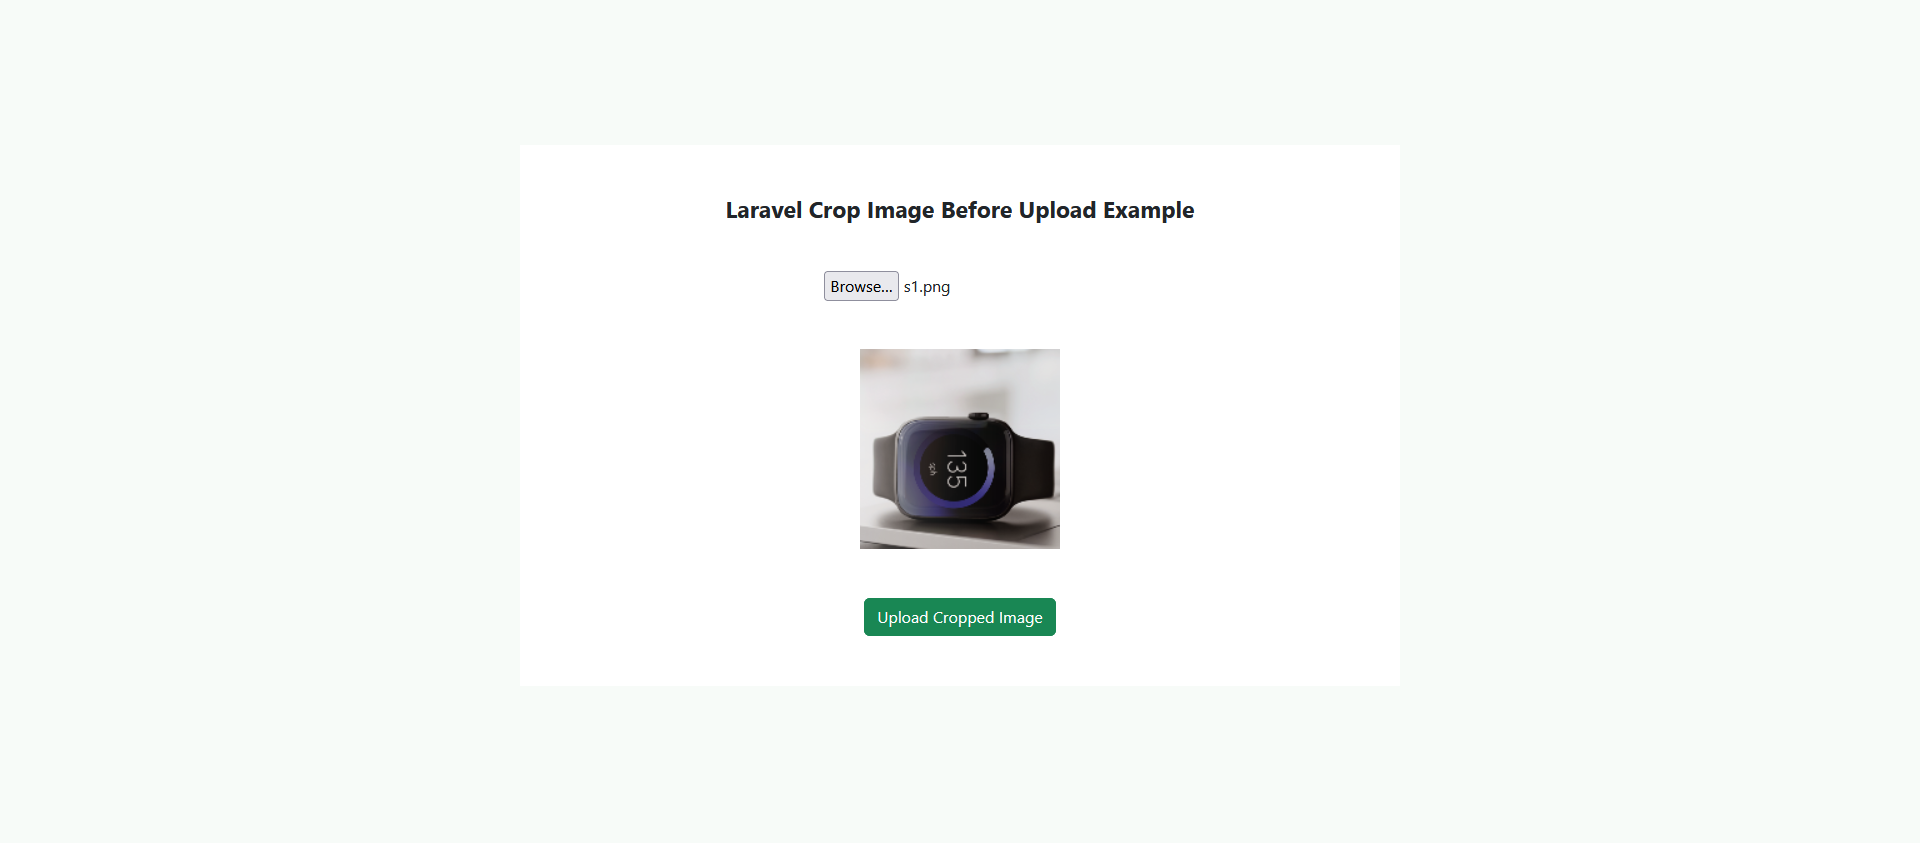
Step 5: Create Blade File
In this step, we'll create a Blade view file named cropImage.blade.php This file will contain a Bootstrap form integrated with Cropper.js for image cropping.
Create the cropImage.blade.php file in the resources/views directory with the following content:
<!DOCTYPE html>
<html>
  <head>
    <title>Laravel Crop Image Before Upload Example</title>
    <meta name="_token" content="{{ csrf_token() }}" />
    <link
      rel="stylesheet"
      href="https://cdnjs.cloudflare.com/ajax/libs/bootstrap/5.2.3/css/bootstrap.min.css"
    />
    <link
      rel="stylesheet"
      href="https://cdnjs.cloudflare.com/ajax/libs/cropperjs/1.5.6/cropper.css"
    />
    <link
      rel="stylesheet"
      href="https://cdnjs.cloudflare.com/ajax/libs/font-awesome/5.15.3/css/all.min.css"
    />

    <script src="https://cdnjs.cloudflare.com/ajax/libs/jquery/3.4.1/jquery.js"></script>
    <script src="https://cdnjs.cloudflare.com/ajax/libs/popper.js/1.14.3/umd/popper.min.js"></script>
    <script src="https://cdnjs.cloudflare.com/ajax/libs/bootstrap/5.2.3/js/bootstrap.min.js"></script>
    <script src="https://cdnjs.cloudflare.com/ajax/libs/cropperjs/1.5.6/cropper.js"></script>
  </head>
  <style type="text/css">
    body {
      background: #f7fbf8;
      text-align: center;
      justify-content: center;
      align-items: center;
    }

    h1 {
      font-weight: bold;
      font-size: 23px;
    }

    img {
      display: block;
      max-width: 100%;
      text-align: center;
      justify-content: center;
      align-items: center;
    }

    .preview {
      text-align: center;
      overflow: hidden;
      width: 160px;
      height: 160px;
      margin: 10px;
      border: 1px solid red;
    }

    input {
      margin-top: 40px;
    }

    .section {
      margin-top: 150px;
      background: #fff;
      padding: 50px 30px;
    }

    .modal-lg {
      max-width: 1000px !important;
    }

    button {
      margin-top: 25px;
    }
  </style>

  <body>
    <div class="container">
      <div class="row">
        <div class="col-md-8 offset-md-2 section border: 1px solid #000; text-center">
          <h1>Laravel Crop Image Before Upload Example</h1>
          <form action="{{ route('crop.image.upload.store') }}" method="POST">
            @csrf
            <input type="file" name="image" class="image" />
            <input type="hidden" name="image_base64" />
            <img
              src=""
              style="width: 200px; display: none;"
              class="show-image d-block mx-auto mt-5"
            />

            <br />
            <button class="btn btn-success">Upload Cropped Image</button>
          </form>
        </div>
      </div>
    </div>
    <div
      class="modal fade"
      id="modal"
      tabindex="-1"
      role="dialog"
      aria-labelledby="modalLabel"
      aria-hidden="true"
    >
      <div class="modal-dialog modal-lg" role="document">
        <div class="modal-content">
          <div class="modal-header">
            <h5 class="modal-title w-100 text-center" id="modalLabel">
              Laravel Crop Image Before Upload Example
            </h5>
            <button type="button" class="close" data-dismiss="modal" aria-label="Close">
              <span aria-hidden="true"><i class="fas fa-times" style="color: #ff0000;"></i></span>
            </button>
          </div>
          <div class="modal-body">
            <div class="img-container">
              <div class="row">
                <div class="col-md-8">
                  <img
                    id="image"
                    src="https://avatars0.githubusercontent.com/u/3456749"
                    class="img-fluid"
                    alt="Image"
                  />
                </div>
                <div class="col-md-4">
                  <div class="preview">
                    <img id="preview-image" src="" class="img-fluid" alt="Preview" />
                  </div>
                </div>
              </div>
            </div>
          </div>
          <div class="modal-footer">
            <button type="button" class="btn btn-secondary" data-dismiss="modal">Cancel</button>
            <button type="button" class="btn btn-primary" id="crop">Crop</button>
          </div>
        </div>
      </div>
    </div>

    <script>
      var $modal = $('#modal');
      var image = document.getElementById('image');
      var cropper;

      // Image Change Event
      $('body').on('change', '.image', function (e) {
        var files = e.target.files;
        var done = function (url) {
          image.src = url;
          $modal.modal('show');
        };

        var reader;
        var file;
        var url;

        if (files && files.length > 0) {
          file = files[0];

          if (URL) {
            done(URL.createObjectURL(file));
          } else if (FileReader) {
            reader = new FileReader();
            reader.onload = function (e) {
              done(reader.result);
            };
            reader.readAsDataURL(file);
          }
        }
      });

      // Show Model Event
      $modal
        .on('shown.bs.modal', function () {
          cropper = new Cropper(image, {
            aspectRatio: 1,
            viewMode: 3,
            preview: '.preview',
          });
        })
        .on('hidden.bs.modal', function () {
          cropper.destroy();
          cropper = null;
        });

      // Crop Button Click Event
      $('#crop').click(function () {
        canvas = cropper.getCroppedCanvas({
          width: 160,
          height: 160,
        });
        canvas.toBlob(function (blob) {
          url = URL.createObjectURL(blob);
          var reader = new FileReader();
          reader.readAsDataURL(blob);
          reader.onloadend = function () {
            var base64data = reader.result;
            $("input[name='image_base64']").val(base64data);
            $('.show-image').show();
            $('.show-image').attr('src', base64data);
            $('#modal').modal('toggle');
          };
        });
        $modal.modal('hide');
      });
    </script>
  </body>
</html>
Running the Laravel App With all the steps completed, you can now run your Laravel application:
php artisan serve
Open your web browser and access the following URL to view the application:
http://localhost:8000/crop-image-upload
You've successfully implemented image+
cropping before uploading in Laravel 10. This feature is incredibly useful for user-friendly image uploads and customization. Feel free to integrate it into your Laravel projects for enhanced image management.
Quick summary:
Congratulations! You've learned how to seamlessly crop images before uploading them in your Laravel application using the powerful Cropper.js library. This skill can significantly enhance your web application's image handling capabilities and improve user experience.
Output:
Source Code
The complete source code for this tutorial is available on GitHub. You can find it Here.
About the Author
Jigar Patel is a Laravel enthusiast and a software developer at JBCodeapp Company. Visit our JBCodeapp to learn more about our work in the Laravel ecosystem.
We're Hiring
Are you passionate about Laravel development? We're always on the lookout for talented developers to join our team. Check out our Careers Page for current job openings.