Boost Your React Forms: Adding Email Validation
- Published on
- Jigar Patel--3 min read
Overview
- Introduction
- Step 1: Install React App.
- Step 2: Create DemoForm Component
- Step 3: Import Component
- Output
- Source Code
- About the Author
- We're Hiring
- Related Blogs

Introduction
In this tutorial, we'll guide you through the process of implementing email address validation in a React.js application step by step.
Step 1: Install React App.
Begin by creating a new React.js app if you haven't already. You can do this with the following command:
npx create-react-app my-app
Step 2: Create DemoForm Component
Now, let's create a DemoForm.js component file where we'll handle form validation. Here's the code for the component:
import React from 'react';

class DemoForm extends React.Component {
  constructor() {
    super();
    this.state = {
      input: {},
      errors: {},
    };
    this.handleChange = this.handleChange.bind(this);
    this.handleSubmit = this.handleSubmit.bind(this);
  }

  handleChange(event) {
    let input = this.state.input;
    input[event.target.name] = event.target.value;
    this.setState({
      input,
    });
  }

  handleSubmit(event) {
    event.preventDefault();
    if (this.validate()) {
      console.log(this.state);
      let input = {};
      input['name'] = '';
      input['email'] = '';
      input['comment'] = '';
      this.setState({ input });
      alert('Demo Form is submitted');
    }
  }

  validate() {
    let input = this.state.input;
    let errors = {};
    let isValid = true;

    if (!input['name']) {
      isValid = false;
      errors['name'] = 'Please enter your name.';
    }

    if (!input['email']) {
      isValid = false;
      errors['email'] = 'Please enter your email address.';
    }

    // Email validation regex pattern
    var pattern = new RegExp(
      /^(("[\w-\s]+")|([\w-]+(?:\.[\w-]+)*)|("[\w-\s]+")([\w-]+(?:\.[\w-]+)*))(@((?:[\w-]+\.)*\w[\w-]{0,66})\.([a-z]{2,6}(?:\.[a-z]{2})?)$)|(@\[?((25[0-5]\.|2[0-4][0-9]\.|1[0-9]{2}\.|[0-9]{1,2}\.))((25[0-5]|2[0-4][0-9]|1[0-9]{2}|[0-9]{1,2})\.){2}(25[0-5]|2[0-4][0-9]|1[0-9]{2}|[0-9]{1,2})\]?$)/i,
    );

    if (!pattern.test(input['email'])) {
      isValid = false;
      errors['email'] = 'Please enter a valid email address.';
    }

    if (!input['comment']) {
      isValid = false;
      errors['comment'] = 'Please enter your comment.';
    }

    this.setState({
      errors,
    });

    return isValid;
  }

  render() {
    return (
      <div>
        <h1>Boost Your React Forms Adding Email Validation</h1>
        <form onSubmit={this.handleSubmit}>
          <div className="form-group">
            <label htmlFor="name">Name:</label>
            <input
              type="text"
              name="name"
              value={this.state.input.name}
              onChange={this.handleChange}
              className="form-control"
              placeholder="Enter name"
              id="name"
            />
            <div className="text-danger">{this.state.errors.name}</div>
          </div>
          <div className="form-group">
            <label htmlFor="email">Email Address:</label>
            <input
              type="text"
              name="email"
              value={this.state.input.email}
              onChange={this.handleChange}
              className="form-control"
              placeholder="Enter email"
              id="email"
            />
            <div className="text-danger">{this.state.errors.email}</div>
          </div>
          <div className="form-group">
            <label htmlFor="comment">Comment:</label>
            <textarea
              name="comment"
              value={this.state.input.comment}
              onChange={this.handleChange}
              placeholder="Enter comment"
              className="form-control"
            />
            <div className="text-danger">{this.state.errors.comment}</div>
          </div>
          <input type="submit" value="Submit" className="btn btn-success" />
        </form>
      </div>
    );
  }
}

export default DemoForm;
Step 3: Import Component
Finally, import the DemoForm component into your index.js main file. If you wish to use Bootstrap, make sure to include it as well.
import React from 'react';
import ReactDOM from 'react-dom';
import * as serviceWorker from './serviceWorker';
import 'bootstrap/dist/css/bootstrap.min.css'; // Include Bootstrap CSS
import DemoForm from './DemoForm';

ReactDOM.render(
  <React.StrictMode>
    <div className="container">
      <DemoForm />
    </div>
  </React.StrictMode>,
  document.getElementById('root'),
);

serviceWorker.unregister();
Now, you can run your React application using the following command:
npm start
Access your app at http://localhost:3000. You now have a simple React form with email validation in place.
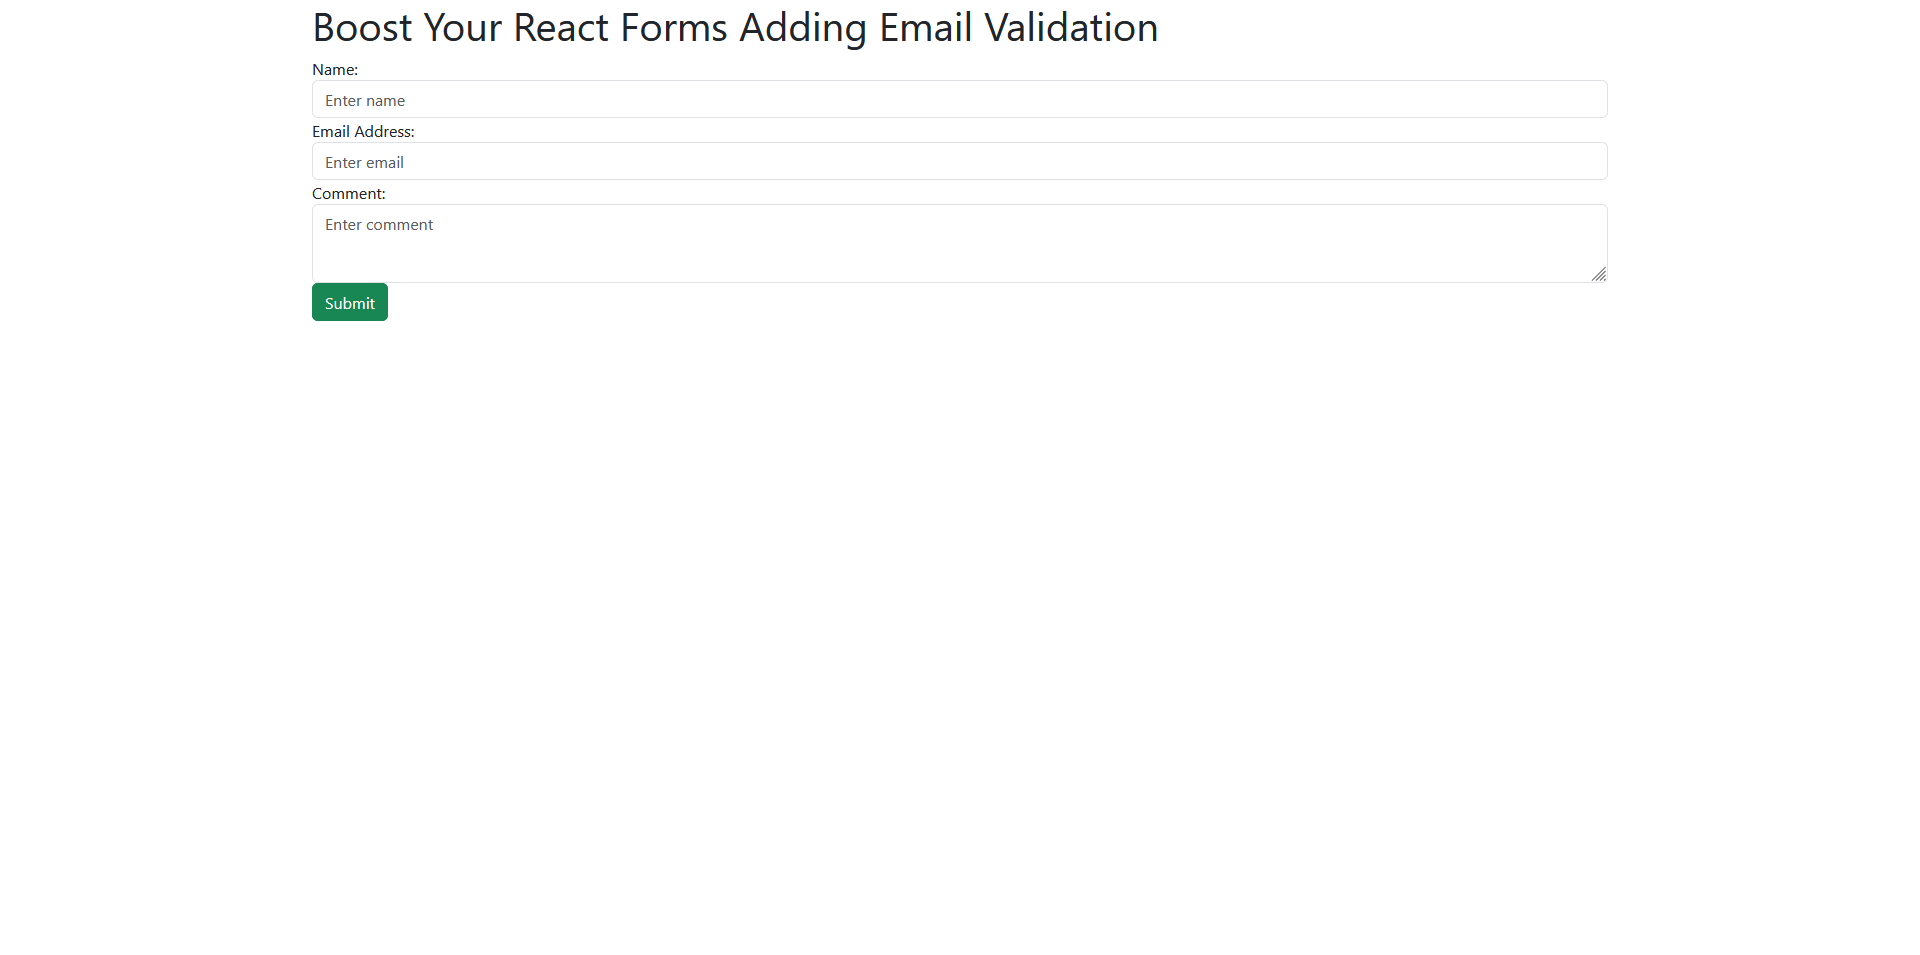
Output
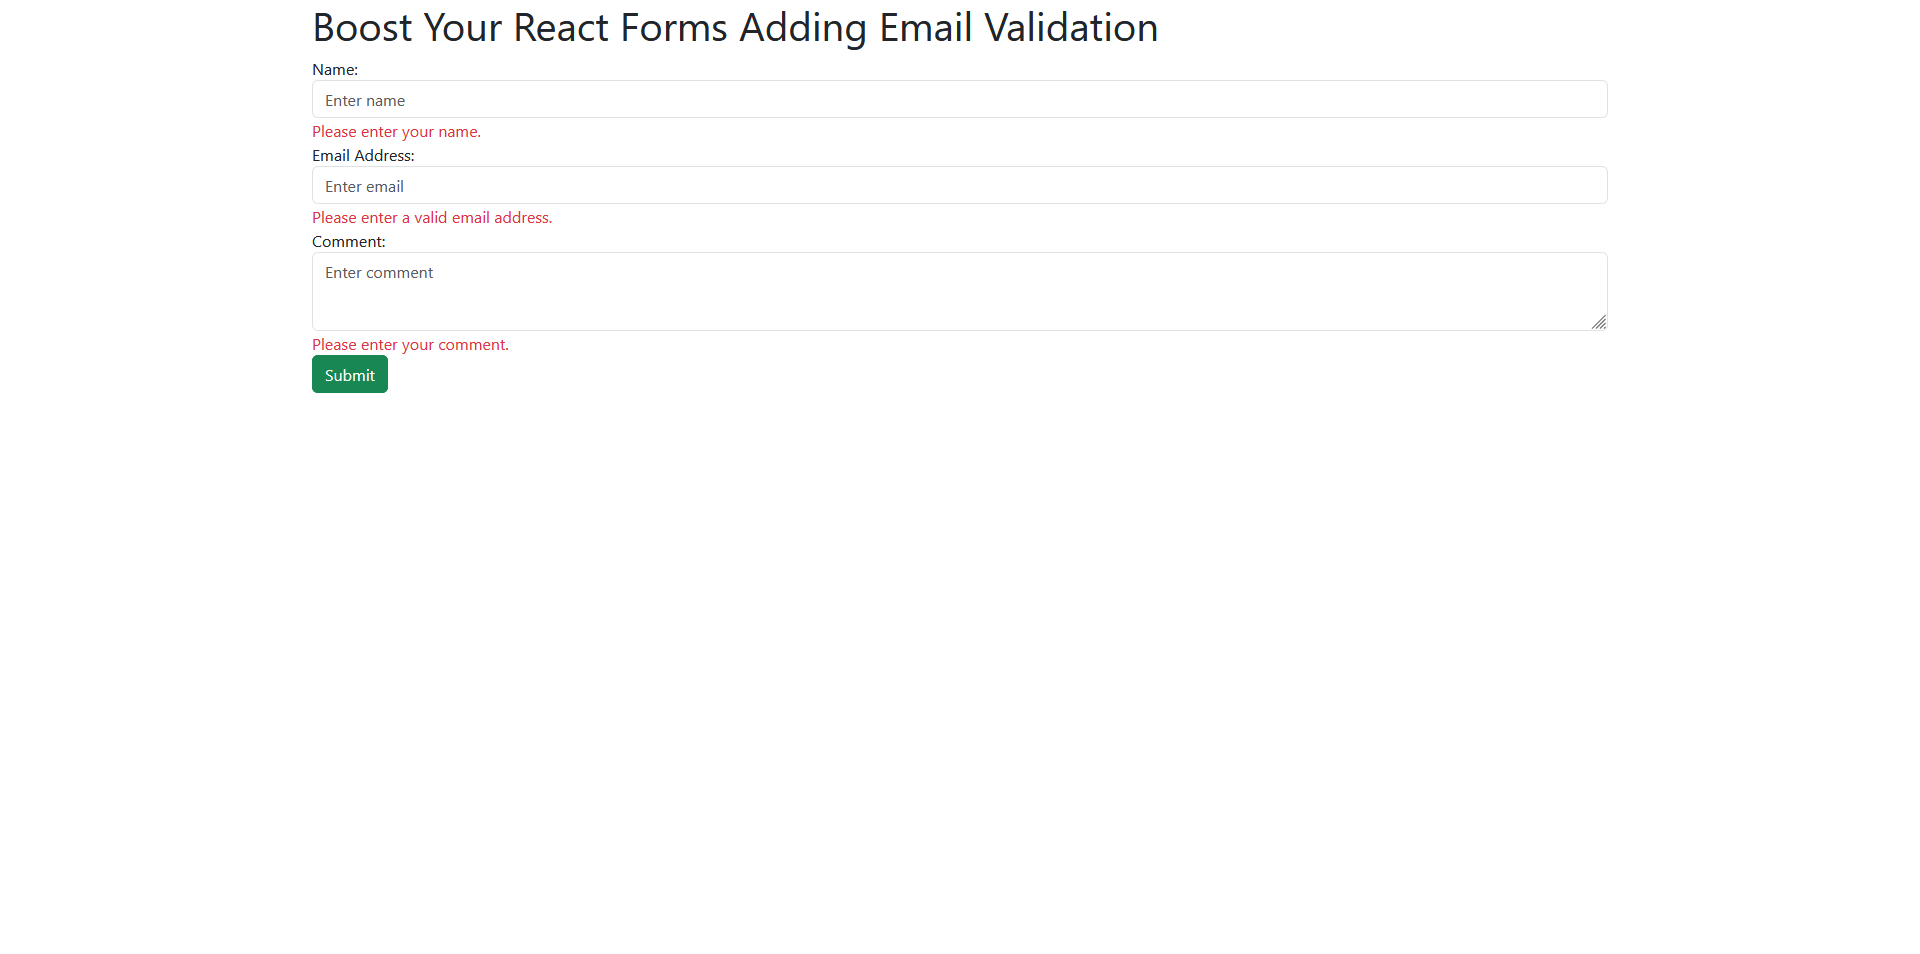
Error
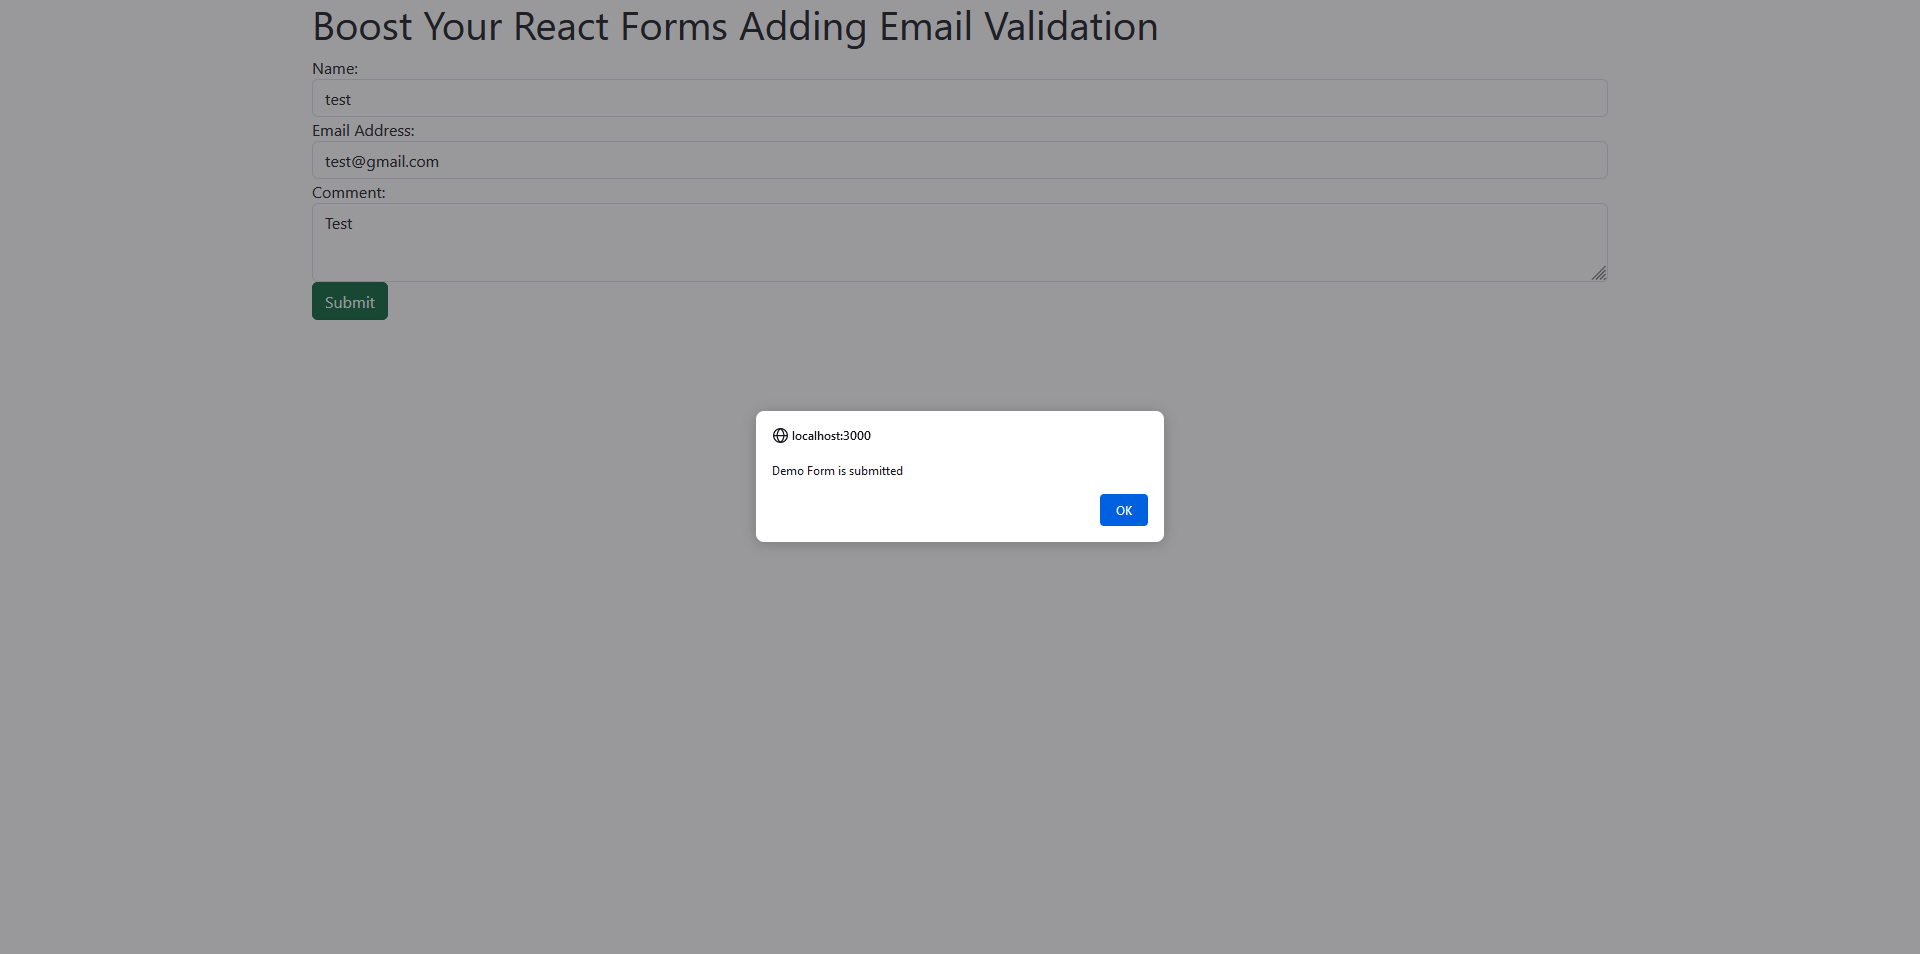
Submit Data
Source Code
The complete source code for this tutorial is available on GitHub. You can find it Here.
About the Author
Jigar Patel is a React.js enthusiast and a software developer at JBCodeapp Company. Visit our JBCodeapp to learn more about our work in the React.js ecosystem.
We're Hiring
Are you passionate about React.js development? We're always on the lookout for talented developers to join our team. Check out our careers page for current job openings.