Getting Started with Create React App
- Published on
- Jigar Patel--8 min read
Overview
- Getting Started with Create React App
- Setup
- Node.js and npm:
- 1. To start a new project quickly, follow these commands:
- Get Started Immediately
- Creating an App
- Using npx:
- Using npm:
- Using Yarn:
- Selecting a Template
- Selecting a Package Manager
- Folder Structure in Create React App
- Understanding Packages
- Here are common npm commands used in React.js projects, along with examples:
- Output
- Source Code
- About the Author
- We're Hiring
- Related Blogs

Getting Started with Create React App
Create React App is a user-friendly tool for building single-page React applications. It simplifies the setup process by providing a modern build configuration without needing extensive manual setup.
Setup
To start using React.js for web development, you need to set up your development environment. Here's a simple guide on how to do that:
Node.js and npm:
React.js works alongside Node.js and npm (Node Package Manager). Begin by making sure you have Node.js installed. You can download it from the official website: https://nodejs.org/
After installation, open your terminal or command prompt and type these two commands to check if Node.js and npm are properly installed:
node -v: This command should show the version of Node.js you installed.
npm -v: This command should display the version of npm.
Seeing version numbers in your terminal means Node.js and npm are correctly installed and ready to use.
Quick Start
1. To start a new project quickly, follow these commands:
npx create-react-app my-app
cd my-app
npm start
Note: If you previously installed Create React App globally with npm install -g create-react-app, it's recommended to uninstall it using:
npm uninstall -g create-react-app
# or
yarn global remove create-react-app
When you're ready to deploy your app to production, create a minified bundle with:
npm run build
Get Started Immediately
You don't need to worry about complex tools like webpack or Babel. They are preconfigured and hidden so you can focus on writing code. Start a project, and you're good to go.
Creating an App
Before you begin, ensure you have Node.js (version 14 or higher) installed on your local development machine. You can use tools like nvm (macOS/Linux) or nvm-windows to switch Node.js versions for different projects.
To create a new app, choose one of the following methods:
-
Using
npx:
npx create-react-app my-app
-
Using
npm:
npm init react-app my-app
-
Using
Yarn:
yarn create react-app my-app
Selecting a Template
You can start your app from a template by adding --template [template-name] to the creation command. For example, to create an app with a TypeScript template:
npx create-react-app my-app --template typescript
Selecting a Package Manager
Depending on your preference, the CLI will use npm or Yarn to install dependencies when you create a new app. For example:
- To use
npm:
npx create-react-app my-app
- To use
Yarn:
yarn create react-app my-app
Folder Structure in Create React App
When you create a React application using Create React App, it generates a folder structure like this:
my-app/
  ├── README.md
  ├── node_modules/       // Important - Contains installed packages
  ├── package.json        // Configuration for your project
  ├── .gitignore          // Specifies files/folders to ignore in Git
  ├── public/             // Public assets and HTML template
  │   ├── favicon.ico
  │   ├── index.html
  │   ├── logo192.png
  │   ├── logo512.png
  │   ├── manifest.json
  │   └── robots.txt
  ├── src/           // Source code for your React app
  │   ├── App.css
  │   ├── App.js
  │   ├── App.test.js
  │   ├── index.css
  │   ├── index.js
  │   ├── logo.svg
  │   ├── serviceWorker.js
  │   └── setupTests.js
Key Folders and Files:
node_modules/: This folder contains all the installed packages and dependencies for your project. It's crucial for your app to function correctly.
package.json: This file holds project metadata and lists the packages your app depends on. It's also where you can define scripts for tasks like starting your app or running tests.
public/: Contains static assets like your HTML template and images that are publicly accessible.
src/: This is where you'll write your application's source code, including React components, styles, and other JavaScript files.
Understanding Packages
In Create React App, packages or dependencies are JavaScript libraries or modules that your application relies on to work correctly. They are managed using a package manager like npm or Yarn.
Here's a brief explanation of some key packages commonly used in Create React App:
React: The core library for building user interfaces in React applications.
React-DOM: A package for rendering React components in the browser.
Babel: A JavaScript compiler that allows you to use the latest JavaScript features in your code and ensures cross-browser compatibility.
Webpack: A module bundler that helps package your application's assets, including JavaScript, CSS, and images, for deployment.
Jest: A testing framework for writing and running tests for your React components.
ESLint: A tool for identifying and fixing code style and potential programming errors in your code.
axios (optional): A popular package for making HTTP requests in React applications.
These packages are specified in your package.json file, and you can add or remove them as needed for your project. The node_modules folder contains the actual code for these packages.
Here are common npm commands used in React.js projects, along with examples:
Command: npm install
Example: When you start a new React project, you run npm install to set up all the necessary tools and libraries listed in your project's package.json file. It's like installing the software you need for your project.
Command: npm test
Example: After writing code for your React app, you can run tests with npm test to ensure that everything is working correctly. Imagine it as a quality check for your app's functionality.
Command: npm run lint (assuming you have a custom script named "lint" in your package.json)
Example: Let's say you want to check your code for errors using a tool like ESLint. You can create a custom script called "lint" in your package.json, and then you run it using npm run lint.
Command: npm install axios --save
Example: If you need a specific library like Axios for making API requests in your React app, you use npm install to add it to your project. The --save part isn't required in newer npm versions but is included here for reference.
Command: npm install eslint --save-dev
Example: When you want to add a development tool like ESLint for code linting, you use npm install with --save-dev. This tool is essential during development but isn't needed in the final production build.
Command: npm outdated
Example: Use this command to check if any of the libraries in your project are outdated and need updating, similar to checking for software updates on your computer.
Command: npm update
Example: If you want to keep your project's libraries up-to-date while respecting certain version constraints, you can use npm update.
Command: npm uninstall axios
Example: If you decide you no longer need a library like Axios in your project, you can uninstall it using npm uninstall, much like uninstalling a program on your computer.
Command: npm search lodash
Example: When you're looking for a particular library like Lodash to add to your project, you can use npm search to find available options from the npm registry.
Running any of these commands will create a folder called my-app in your current directory. It contains the initial project structure and installs necessary dependencies. No need for complex configurations – you'll have everything you need.
Once the installation is complete, navigate to your project folder using:
cd my-app
Scripts
Inside your project, you can run these built-in commands:
-
To start the app in development mode:
npm start
# or
yarn start
-
To run tests interactively:
npm test
# or
yarn test
-
To build the app for production:
npm run build
# or
yarn build
Your app is now ready for deployment.
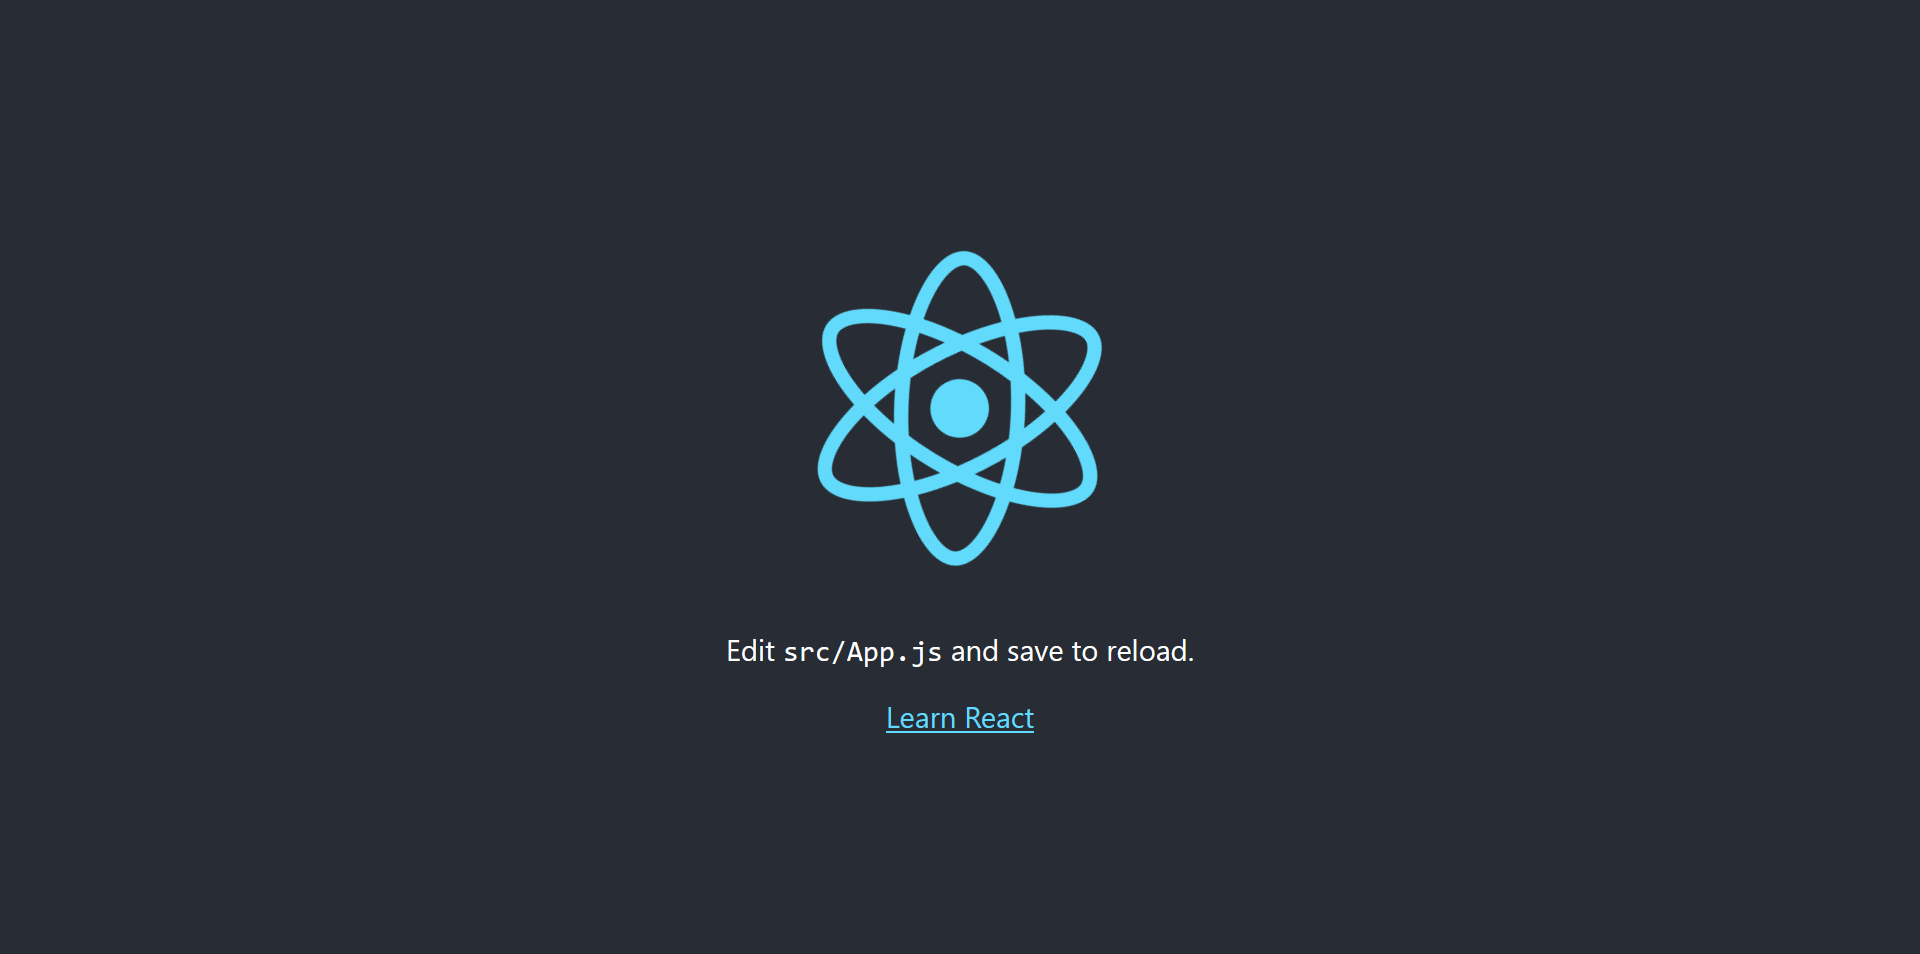
Output
Open http://localhost:3000/ in your web browser to view your app.
- Open your web browser and enter the following URL in the address bar:
http://localhost:3000/
- This will display your React app in the web browser, and you can see the output of your application.
Source Code
The complete source code for this tutorial is available on GitHub. You can find it Here.
About the Author
Jigar Patel is a React.js enthusiast and a software developer at JBCodeapp Company. Visit our JBCodeapp to learn more about our work in the React.js ecosystem.
We're Hiring
Are you passionate about React.js development? We're always on the lookout for talented developers to join our team. Check out our careers page for current job openings.
Related Blogs
-
Mastering React Debugging: Tips and Techniques for Effective Debugging
-
Creating Toast Notifications in React.js: Step-by-Step Guide
-
Redirecting to Another Page in 5 Seconds with jQuery in React
-
Creating a Secure Login Page in React: User Authentication Example